


Tips for Posting Instagram Reels the Easy Way
Instagram Reels has become an essential part of the user experience on this social network, letting us share fun, funny, and creative moments in just a few seconds. Still, not everyone knows how to create and post Reels with ease. If you want to start using this feature without too much trouble, keep reading to learn how you can make the most of Instagram Reels.
Why Should Creators and Marketers Focus on Instagram Reels?
Since Instagram introduced Reels in 2020, the feature has established short-form video as an indispensable part of social media marketing. Vertical short videos paired with audio or music give brands a creative new way to tell their story. Creators and marketers recognized the huge value of using Reels early on and have been posting them consistently.
We all know the future belongs to video content, no matter the platform. But why create Reels instead of choosing other video options? With nearly 2.5 billion monthly users, Instagram gives you access to a vast audience. Used effectively, Instagram Reels is a quick and easy way to reach your target audience, build engagement, and drive sales.
On top of the ability to engage with a large, ready-made community, the short video length and audio-focused format of Reels lower the barriers to creating content. The Reels format rewards authenticity and originality, letting you share useful information or entertain viewers instead of chasing perfection.
By building a workflow for shooting video, adding audio, writing text, editing, and posting, you can start putting together compelling Instagram Reels that attract your ideal viewers and expand your engagement and reach.
Use the VAT Method (Video, Audio, Text) to Create Effective Reels Easily:
Build a Diverse B-roll Video Library
The first step to creating Instagram Reels smoothly is to build a library of diverse B-roll clips. Instagram Reels thrives on moving visuals, but producing these videos and animations every day takes a lot of effort.
This is where B-roll becomes important. B-roll refers to supplementary footage such as transition shots, establishing shots, and close-ups. Imagine watching a movie set in New York: you often see a quick shot of the Brooklyn Bridge or a close-up of pedestrians on the street. These shots set the context for the story.
On Instagram, for example, think of glancing at a clock to show time passing, or focusing on typing on a keyboard while you talk about work. Building a B-roll library gives you your own custom pool of video assets that you can reuse and re-edit to create Instagram Reels. B-roll saves you time, and batch-shooting these clips helps you jump into video trends quickly and keep your content consistent.
When it comes to moving from taking beautiful photos to appearing on screen, some long-time Instagram marketers may feel a little nervous. Think of B-roll as a beginner or intermediate step before you start shooting live, on-camera video, especially if you’re not yet comfortable in front of the camera.
Collecting a diverse range of original B-roll clips will give you material for any Reel idea. Shoot footage of:
- Daily tasks and workflows
- Expressions and reactions
- Walking scenes from different angles and perspectives
- Shots of your business location
- Product showcase montages
- Weekend activities and personal hobbies
See more: Facebook Messenger for Business: Analyze and Optimize Your Strategy
Shoot at least 10 to 20 seconds of each of these moments from different distances and angles to keep your audience interested and give yourself flexibility when editing later. If you’re filming alone, use a tripod and a Bluetooth remote to make the process easier, or ask a friend for help. You don’t have to appear in the shot yourself, either. Some Reels with millions of views are simply a beautiful background scene, such as a gorgeous waterfall. Combined with a good track and a voiceover, this will make your Reel stand out.
In addition, you should shoot in 4K to ensure the highest image quality, and pay attention to how you lay out your shot within Instagram’s user interface. Typically, the top of the frame is where you’ll put the intro or text, and the bottom is where you’ll see the username and caption. So make sure to place your subject in the middle of the frame. Also keep an eye on Instagram’s side icons (such as “Like,” “Comment,” and “Send”). Staying within Instagram’s “safe zone” ensures everything stays in frame for your viewers.
Next, carefully organize this random stash of videos by sorting them into labeled albums such as “New York B-Roll” or “Expressions” so you can retrieve them quickly. Then store the clips on your phone or in the cloud through services like Google Drive or Dropbox to keep them safe and easy to access.
Now, whenever an idea strikes, you can quickly pick the right B-roll clips to support your story. This removes the pressure of filming or hunting for new footage every time you want to create a video. You can keep expanding your homemade video library indefinitely.
Add Audio
While visuals captivate viewers, audio is what makes your Reels truly engaging. The right background sound can define the entire emotional tone and energy of your content.
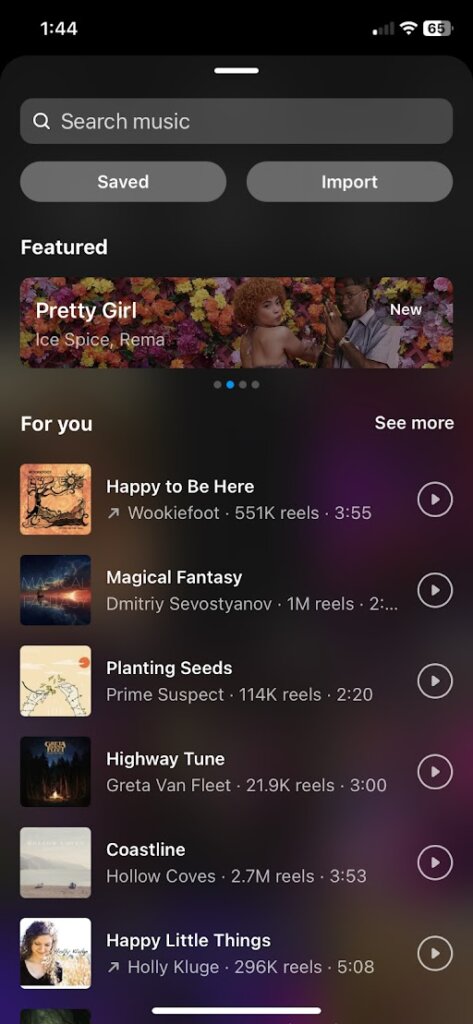
Which audio options work best for your Reels? You can choose from trending sounds, original voiceovers you record yourself, ambient background music, or standard music tracks – each one brings its own benefits.
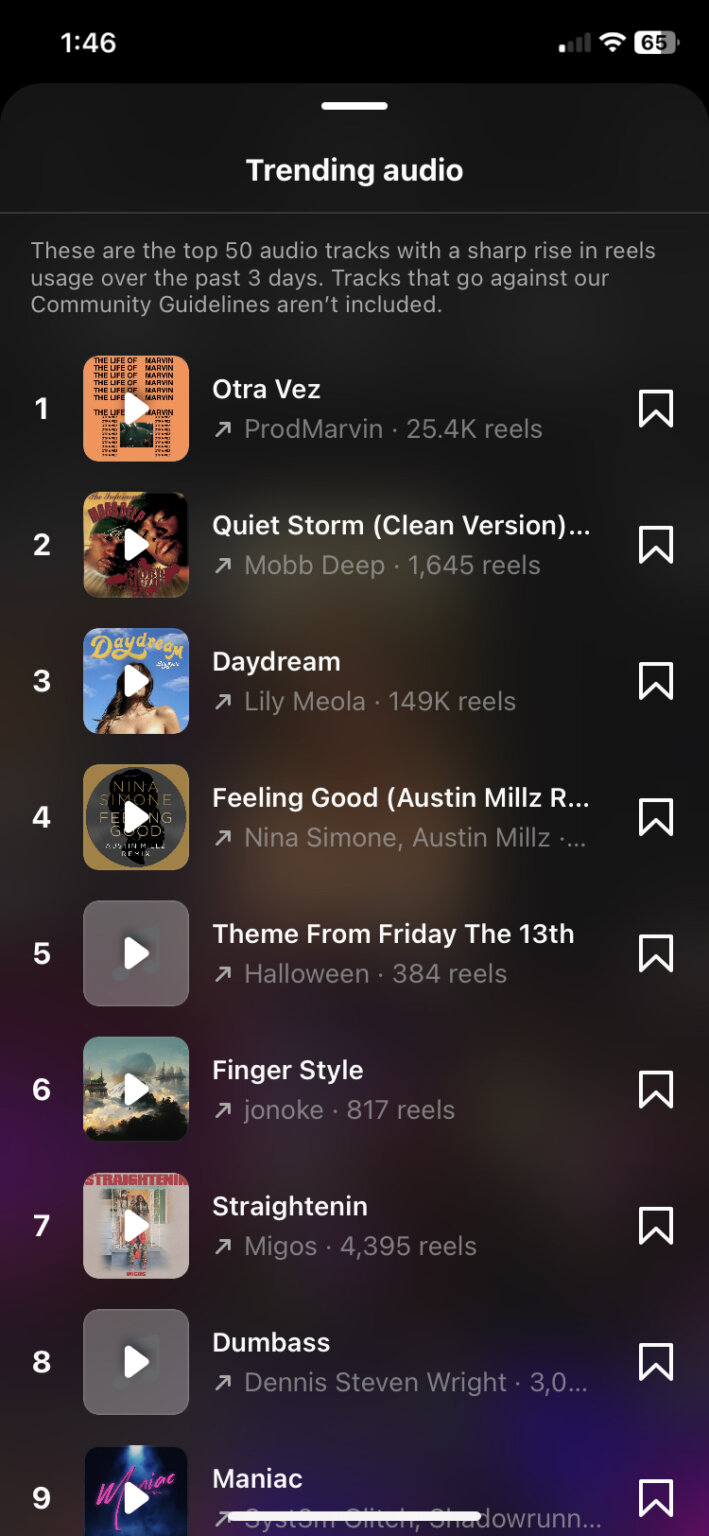
Take Advantage of Trending Audio. Nothing goes viral faster than a popular sound from TikTok or Reels. Some sounds become famous and tied to our collective sense of community, like the “Oh no” audio clip. It’s a quick way to connect with what’s popular, and we know the Reels algorithm weighs the popularity of a sound.
First, find a trending sound through Instagram’s audio library.
Script with a clear goal
Consider the mood conveyed by the trending sound. Is it fun? Relatable? Inspiring? Educational? Then choose a B-roll clip that matches the mood of the audio. Upbeat music suits energetic dancing, while a serious news headline would fit better with your clip focused on a computer, for example. What matters is making every detail work together harmoniously.
Pro tip: If you have a business account on Instagram, you may not get full access to Instagram’s audio library. Switch your account type to “Creator” and you’ll get full access.
Rather than just entertaining, your Reel may aim to inspire or educate in a specific field. In that case, skip the popular audio and choose an original voiceover that carries your brand. This is especially useful for marketers who want to create lasting content. Discuss your product, share insights, teach a new skill, or tell your origin story. What matters is making sure your narration fits the B-roll visuals that represent your brand.
Use music
To avoid a dull feel, accompany your voiceover with fitting music. Keep the volume low enough so it isn’t distracting, and plan your content to avoid unnecessary rambling. Try recording your voiceover in a single take so editing is easier later. You can record your voice in the IG app under the “Edit” tab in Instagram Reels.
For example, say you want to create a Reel introducing yourself or your brand. You can simply upload a series of B-roll clips to IG Reels and tell the story of your journey through Instagram Reels. It’s an easy and approachable way to introduce yourself.
Adding music to Instagram Reels has also become an important part of the process. In particular, the music in Instagram Reels is like the soundtrack of a film. The right melodies bring your audience into the world you want to create.
When using music in Instagram Reels, remove the vocals if they interfere with your voice.
Use these tips to help your Instagram Reels attract more attention:
- Use songs and music samples your target audience is familiar with.
- Trim the audio to fit the length of your Reel.
- Adjust the volume so the music sits at only 6-8% behind your voice/commentary.
- Turn on captions.
- Use Meta’s free sound collection to avoid copyright issues, especially if you run ads alongside your Instagram Reels.
Create an eye-catching hook line
Like a headline, an opening hook grabs your audience’s attention and communicates the value of your Reel.
Write compelling hook lines that speak directly to your target viewers within the first two seconds of your Instagram Reels. For example, “Five Hook Ideas to Save Time” or “I Asked AI to Audit My Instagram Account, and Here’s What Happened”. Compelling hook lines give your audience a reason to watch your entire Instagram Reels, which in turn increases your completion rate.
Keep your hook lines short. They should be clear, concise, personal, and give context for your Instagram Reels. Next, display your hook on screen for about 5-7 seconds so viewers have time to absorb the message before you expand on it. If the hook runs long, or you’re sharing several tips that won’t all fit on screen, you can leave the hook up for the whole duration of the Instagram Reels, or tell viewers to check the description if you can’t fit everything on screen.
To make sure your hook is engaging, ask yourself these questions:
- Does the text contrast with the background?
- Is the font legible and large enough?
- Is the message personal?
- Is the text readable?
Edit Instagram Reels on your phone
While complex Instagram Reels may call for editing software, the Instagram app’s interface is well suited to basic video assembly.
Edit directly in Instagram whenever you can. This helps you avoid the risk of your file being compressed every time you move from one device to another.
If you have a more complex Instagram Reels with many clips, use tools like InShot for better editing control.
Post Reels regularly
Plan to post Reels 3-4 times a week. This balances the time you invest with the results you get. Consider creating sustainable content on a monthly basis to optimize your performance. If you create Instagram Reels based on trends, you may need to produce content more continuously, but this will boost your visibility.
Before posting, take some time to analyze your IG Insights to help identify interesting topics to work into your Reels. Figure out which of your Instagram Reels have performed well. Then you can reuse some of that content without starting from scratch. Finally, testing your content types and posting frequency will help you find the best posting approach for you.
When you schedule your Instagram Reels, it’s important to think of it as an equation. Maybe you’re scrolling through Instagram and find a trending track you want to use. Now, which B-roll clips would fit it? Then look at your Insights and see which content was saved the most, commented on the most, or shared the most.
This will help you understand which topics your audience already cares about. Now you can reuse existing pieces like B-roll and hooks to save time on content creation and let you produce content continuously.
Conclusion
Instagram Reels is a powerful tool that turns ideas into reality easily and enjoyably. Tap into its potential to build deeper connections and achieve success on social media.

Nguyễn Đình
Bảo




As CEO of The7, I am committed to sharing practical, useful knowledge with every reader. Every article on The7 is based on my 7 years of hands-on experience in marketing — Facebook advertising, LinkedIn advertising, Google advertising, and marketing strategy. I hope you take away plenty of insight from these posts and apply it successfully in practice.
Related Articles
Building a Full-Funnel Content Marketing Strategy on LinkedIn
Table of Contents Toggle Why Build Content Marketing for the Full Marketing Funnel? (Why Full-Funnel Content Marketing?)Creating Your Strategy (Creating Your Strategy)Implementing Your Content Strategy (Rolling out your content strategy)Summary...
Designing Creative Content for LinkedIn
Table of Contents Toggle Why Is Good Creative Content So Important? (Why is Good Creative Important?)Key Components of Creative Design (the core elements of creative design)Summary (summary) Why Is Good...

Building an Organic Business Presence on LinkedIn With a LinkedIn Page
Table of Contents Toggle Why Have a LinkedIn Page?Establishing Your LinkedIn PageKeeping Your LinkedIn Page ActiveThe Measure of SuccessSummary About LinkedIn Page (Summary) Why Have a LinkedIn Page? For a...
6 Best LinkedIn Marketing Strategies for B2B in 2026
Table of Contents Toggle LinkedIn 2026: Where B2B Decisions Get MadeStrategy #1 – Why Is LinkedIn the Best B2B Marketing Channel Today?1. Decision-makers are concentrated here2. Users are in work...

7 Social Media Trends for 2026: The Era of Real Value, Real Conversion, and Real People
Table of Contents Toggle Social media is entering the biggest restructuring of the decadeTrend 1: Why is buying directly in-app becoming the new standard for 2026? (On-Platform Conversion)What should businesses...

What Is TikTok Marketing? Effective TikTok Marketing Strategies
TikTok has been topping the global rankings of the most downloaded and most visited apps. That makes it a gold mine for marketers who love creativity. In this article, The7...